How to Reset Your Account and Start Over
As a new Accounting customer, you may decide you want to reset your entries and start over from scratch.
There are two main steps to this process:
- Void transactions when you can
- Reduce any remaining accounts to zero (i.e., “zero out accounts”)
Also, if you do not have our payroll product and only have Accounting, you may want to consider simply cancelling your account and signing up again with a brand new account.
Step 1: Void transactions when you can
Before starting the process, void anything you can, such as unpaid invoices. Voiding will help keep your lists ‘clean’ later. Reducing accounts to zero won’t actually remove invoices, bills, etc. from their respective lists.
You can void the following types of transactions by going to Reports > Financial Reports > General Ledger. Make sure to choose “Accrual” under Accounting Basis to see your unpaid invoices and bills.
- Beginning balance entries
- Invoice payments and invoices
- Bill payments and bills
- Journal entries
- Imported Transactions
- Deposits or Withdrawals
Unused credit memos: Customers > Specific Customer > Credits
Estimates: Delete estimates from the ‘Estimates’ screen. Please note that estimates don’t impact your account balances.
Step 2: Reduce accounts to zero
If you still have remaining transactions that weren’t voided, you can make journal entries to reset your account balances to zero.
- Go to Reports > Financial Reports > Account Trial Balances report
- Download, then open, the spreadsheet (not the report)
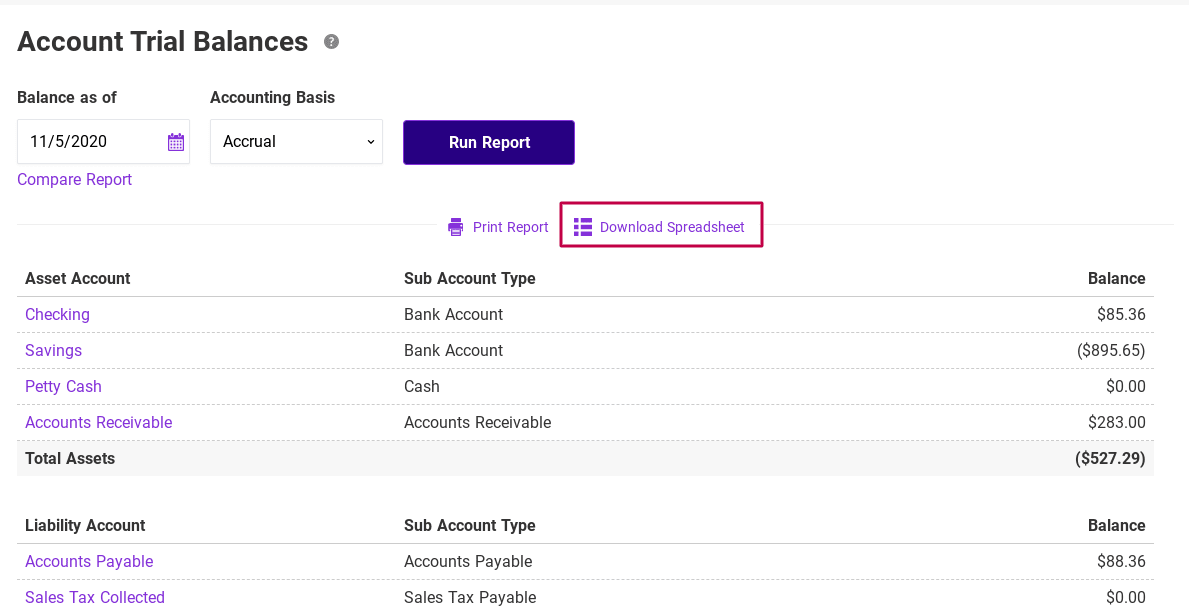
- After downloading and opening the spreadsheet, head over to the journal entry page in your account by going to Accounting > Financial Tasks > Journal Entry
- Enter a date that makes sense for you. For example, if you’re zeroing out everything from March or earlier, put March 31 as the date.
Make sure ‘Use Debits/Credits’ is selected here (it’s OK if you don’t understand those!).
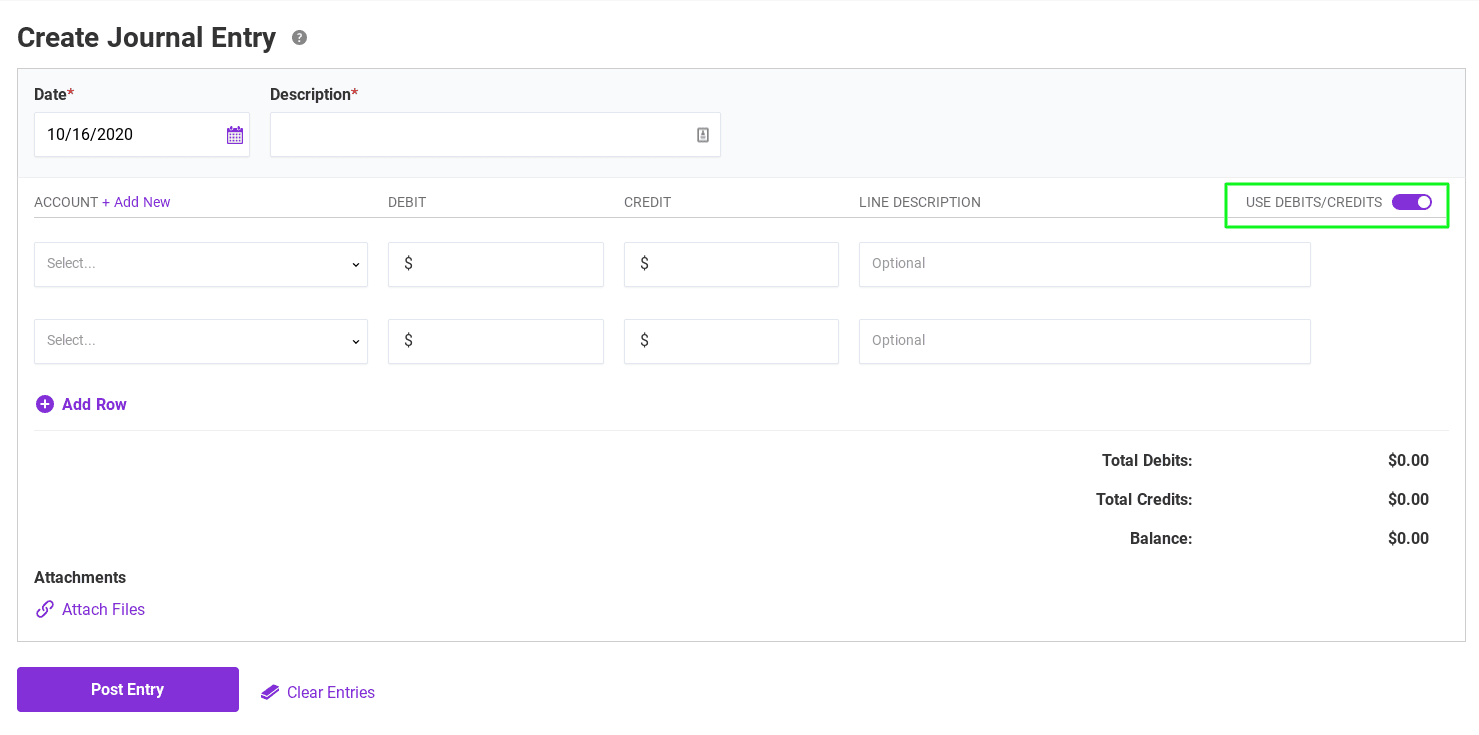
Basically, what you’re going to do is look at totals for each account in your spreadsheet, and then ‘zero out’ that account in the journal entry.
If the account balance is POSITIVE, enter a CREDIT (second column) for that amount. If the account balance is NEGATIVE, enter a DEBIT (first column) for that amount.
Depending on what program you opened your spreadsheet in, negative numbers might have a negative sign before them, or they may have ( ) around them:
Example from an account balance with negative signs:

Example from an account balance with ( ) around negative numbers:
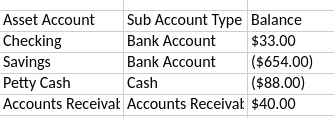
Here’s what the journal entry would look like to ‘zero it out’:

And, here’s another example:
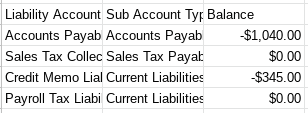
Negative numbers get debits in the journal entry:

Because journal entries have to balance, you must do this with all of your accounts at once.
If you make any mistakes, don’t panic! You’ll be able to tell because the entry won’t balance. Just go back and review the accounts and your entries.
Remember: if the account balance is POSITIVE, put in a CREDIT (second column) for that amount. If the account balance is NEGATIVE (negative sign or in parentheses), put in a DEBIT (first column) for that amount.
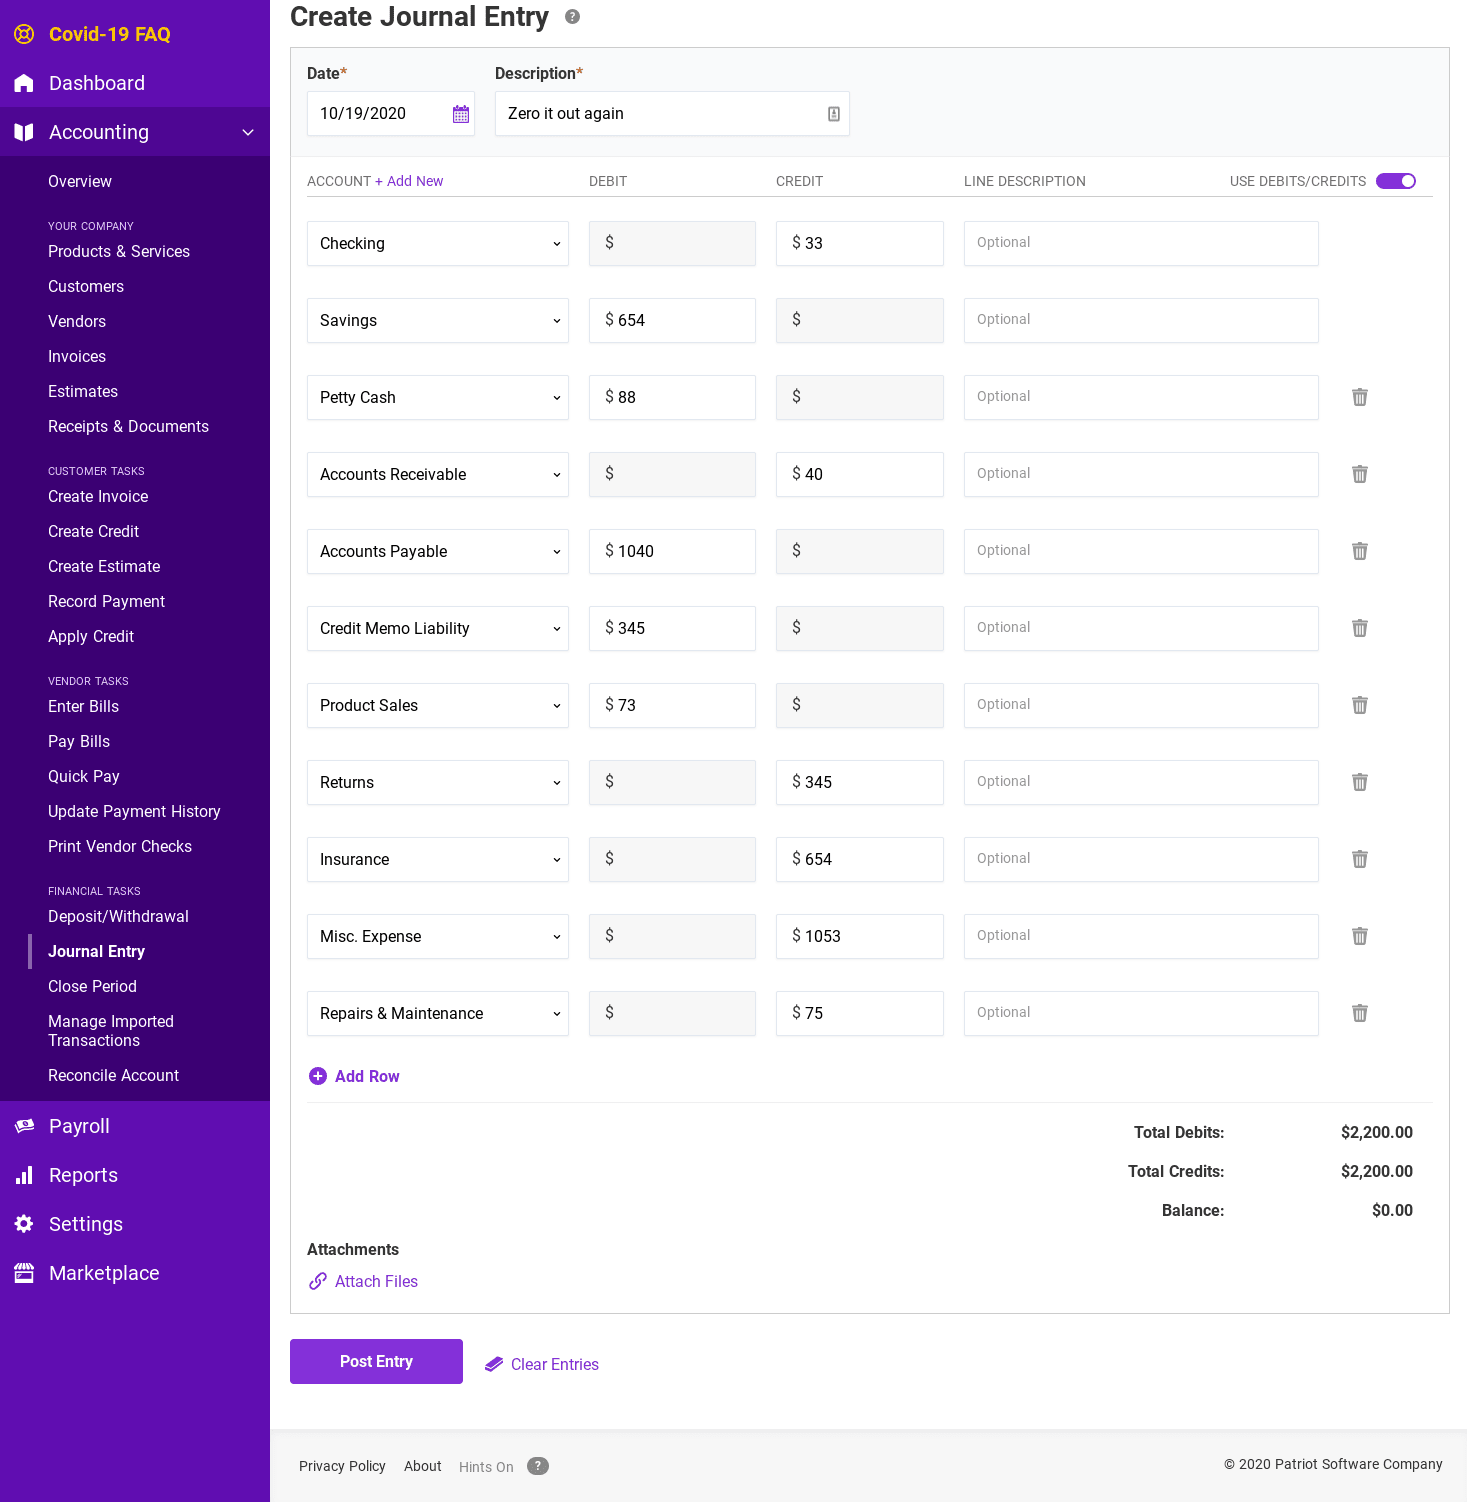
Full journal entry example:
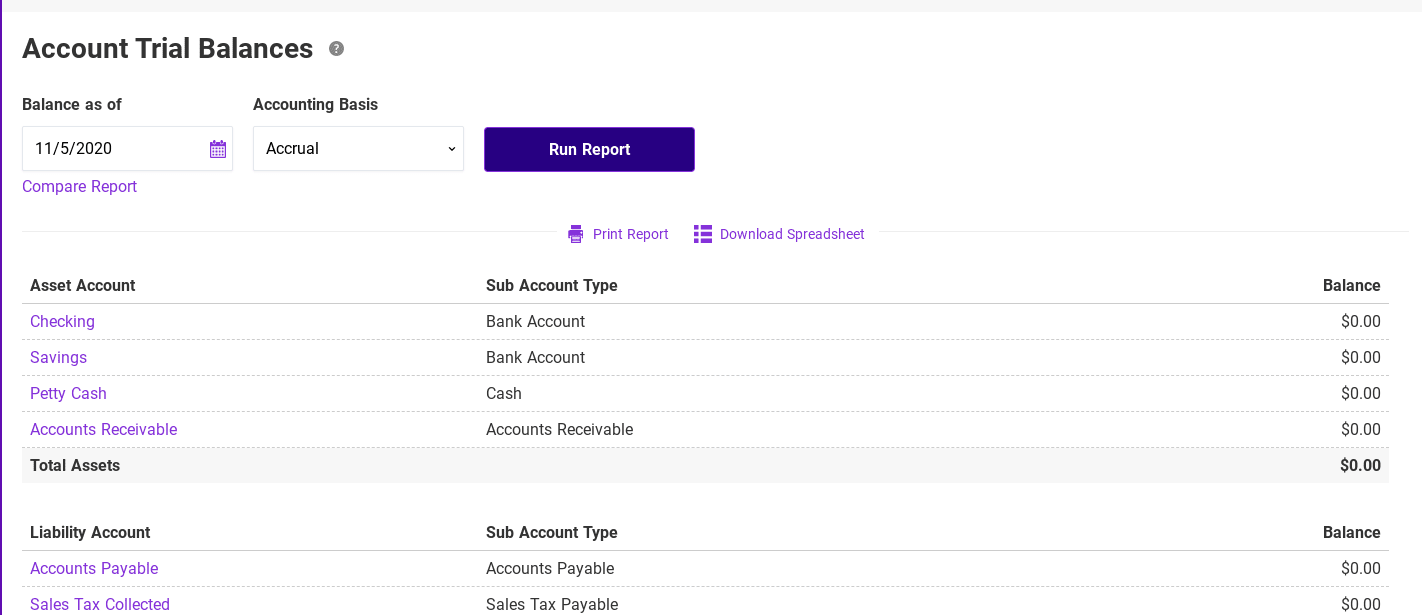
Check out your Account Trial Balances report again, and enjoy the beautiful column of zeros!
Your feedback will not receive a reply. If you have a specific issue, please reach out to our support team here.


