Setting Up Your Chart of Accounts
To start using Patriot’s Accounting Software, you need to set up your Chart of Accounts. We have added some commonly-used accounts to help you create your chart of accounts. Note that the accounts available will depend on whether you select Cash, Modified Cash, or Accrual account basis. For more details, see Which Accounting Basis Should I Choose?You have the option to use account numbers in addition to naming each account. If you use account numbers, these will appear throughout the software when choosing or displaying the account. In the setup wizard, choose “Yes” to the question “Do you want to use Account Numbers?” Once you are past the setup wizard, you can go to Settings > Accounting Settings > General Settings > Chart of Accounts > and toggle Show Advanced Options to use account numbers.
If you are coming from another accounting software or have used a spreadsheet for your chart of accounts, please check out our help article “How to Import Your Chart of Accounts.”
There are five different types of accounts:
1) Asset Accounts are your main accounts that track the money deposited and withdrawn from your bank or cash accounts. Checking, Savings, and Petty Cash accounts have already been added for you. You can change the account names to something more meaningful by clicking inside each box. You can add as many asset accounts as you need, and remove any that you do not use.
2) Liability Accounts are used to keep track of the debts and obligations that your business owes to other businesses or individuals. These should be reported on your balance sheet if you are using modified cash basis or accrual basis. A Sales Tax Collected account has already been added, and you can add more as needed.
If you use Patriot to run payroll, you must use Modified Cash basis and create a liability account with the Subtype of “Current Liabilities” to track your payroll taxes that you will be paying to tax agencies (if you are a Basic Payroll customer), and deductions/contributions that you will be paying to benefit providers.
3) Equity Accounts are created to track owner investment in the business, owner withdrawals, and any net income or loss incurred. Equity can also be calculated by subtracting assets from liabilities. We have added a default account, “Owners Equity,” for you to use in equity transactions, but you can rename or create additional accounts as needed.
4) Income accounts keep track of incoming money, such as product sales. Commonly used income accounts have already been added. You can rename an income account, add a new one, or remove these accounts as needed.
5) Expense accounts keep track of the types of outgoing money, such as payroll expenses. A list of commonly used expense accounts has already been added. You can rename an expense account, add a new one, or remove any you do not use.
Subaccounts
If you are an Accounting Premium customer, you can add subaccounts under your main chart of accounts for a more detailed view of your chart of accounts. Although you can add up to 8 levels of sub-accounts under one main account, you’ll want to be aware of some limitations:
Some system accounts are restricted and cannot have subaccounts added, nor can they be made into subaccounts:
- Accounts Receivable
- Accounts Payable
- Sales Tax Collected
- Credit Memo Liability
- Cost of Goods Sold – subtypes cannot nest with Expense subtypes or vice versa.
When you are finished setting up your chart of accounts, click “Continue” at the bottom of the page. Next, you will set up your Transaction Settings.
To Manage Your Accounts After Initial Setup
Settings > Accounting Settings > Chart of Accounts
- Click the “Add New Account” link next to the account type you want to add (Asset, Liability, Equity, Income, or Expense). A set of blank fields will appear.
- Enter a unique description for the new account, up to 40 characters.
- Select the Subtype. The Subtype will group similar accounts together and determine how transactions are recorded to the general ledger. These Subtypes are not editable. Note these are different than subaccounts. See below for subaccounts.
- Check the box “Is this a subaccount?’ if applicable.
- (Subaccounts are only available for Accounting Premium customers. To upgrade to Accounting Premium, go to Settings> Add or Cancel Software. Select Accounting Premium and click “Save”.)
- Keep the “Active” selection. You can inactivate the account later if you no longer use it.
- Click Save.
For your convenience, you can also add a new account “on the fly” when recording a journal entry.
Accounting > Financial Tasks> Journal Entry
- Click the +Add New link. A modal will appear for you to fill in the following fields:
- Account Number (if used)
- Account Name
- Account Type
- Subtype (if applicable)
- Click the box “Is this a subaccount?” if applicable.
- (AccountingSubaccounts are only available for Accounting Premium customers. To upgrade, go to Accounting Premium, go to Settings> Add or Cancel Software. )
- Click Save.
To edit an account:
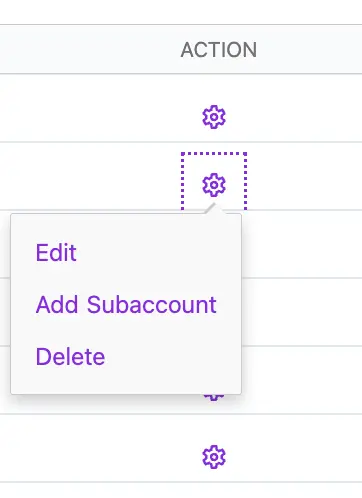
- Under the “Action” column, click the settings ‘cog’ icon. Then, click the “Edit.”
- Make your changes, and click Save.

To inactivate an account:
- Under the Active column, uncheck the “Active” box.
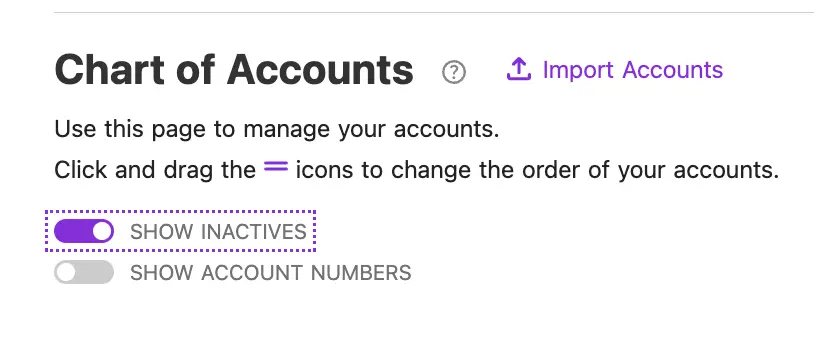
- Click the “Show Inactives” toggle at the top of the Chart of Accounts to see inactive accounts in your COA.

To delete an account:
- Under the “Action” column, click the settings ‘cog’ icon. Click the delete link. If you do not see a “Delete” icon in that row, it has been used in a transaction or is a set account in the software, and cannot be deleted. Instead, you can inactivate an account with history.

- NOTE: Once you delete an account, it’s gone for good.
- Click Yes to confirm your deletion.
Your feedback will not receive a reply. If you have a specific issue, please reach out to our support team here.